If you’re tired of gaping jeans, in this article you will find out how to fix gaps on jeans.
This article is all about that incredibly unpleasant gaping part at the back of your jeans.
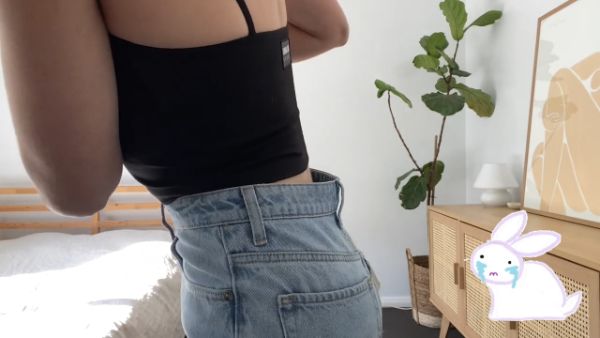
You are well aware of the fact that when you put on a pair of pants or jeans, they fit around the thighs and everywhere else, but there is a large gap at the back of the waist.
When you buy a pair of jeans, you don’t want to feel the wind going down there.
This sounds quite familiar, I’m sure.
Table of Contents
Why Does a Gap Exist?
Because the clothes are made for everyone and don’t fit exactly, they are sold off the rack in high street stores as well as more expensive stores, which is why this is such a common issue for female customers and for anyone who shop.
That needs to be said again because it’s crucial.
Since the clothing is made for everyone when you purchase it off the rack, nobody can wear it perfectly.
As soon as you hear it, it makes sense.
They are making clothes that are suitable for a large number of people. And so they fit everybody just okay. Except for the extremely lucky, they don’t fit anyone particularly well.
That is why I’m giving you these suggestions. There are simple actions you may take that will greatly benefit you.
If this sounds familiar, it’s because you are either an hourglass shape or a pear shape, or a triangle shape, as it is also called.
Your hips will be larger and you will have a defined waist as a result. Depending on your unique shape, it might also occur with some of the other body shapes, such as the inverted triangle.
But in general, the defined waist means that you will frequently have a gap between the back of your body and the back of your jeans.
What are you going to do about it?
I have a few suggestions for you.
Don’t Size Down
Your first step is to make sure that you do not buy a smaller size jeans than you normally would just so the waistband may fit around your waist. Because if you do that, you’ll lose the room you need across your hips, thighs, and the bum in order to achieve that fit on the waistline.
You’re going to feel a little uncomfortable either way. In this case, I advise choosing a pair of comfortable jeans in a size that fits your hips.
Yes, you will have that gap. We’ll deal with that in just a moment.
Just be careful not to start experimenting with your sizes and choosing too-tight jeans since you won’t be able to wear them because you’ll be uncomfortable.
If you’re very lucky, you might find a pair of trousers that are exceptionally well-tailored.
Due to the quality of the workmanship, they are often a little more expensive, and occasionally good denim manufacturers will design a line that accommodates curves.
The Curve ID jeans from Levi’s from a few years ago were incredible. They are no longer available. However, there are numerous denim companies that produce curvy styles.
The Bold Curve was a design by Levi’s that suited people with wide hips and a narrow waist. They have a perfect fit.
If the tailoring is exceptionally superb, you may occasionally be able to buy items off the rack.
Here’s the next tip if the tailoring isn’t up to par.
Wear a Belt
The next thing that you should do is something that is completely obvious. Sometimes the gap is barely noticeable and is small.
In this case, a belt might be the thing. If you haven’t worn a belt, this might be the time. It’s a fairly straightforward fix. Put a belt on, job done.
However, there are times when you may have too much fabric and when you put the belt on, it causes the fabric to gather, making your outfit look a little bit cheap.
In such case, we’ll go on to the next tip.
Get Alterations Done
My next tip is if you do have all that fabric gathering under your belt; it’s just not going to work.
What would you do in this case?
You might not like the next tip. But this is my solution.
It’s possible that you’ll need some alterations done.
In this instance, I would strongly advise you to consider the cost of your alterations into your pair of jeans.
If you regularly spend $100 on jeans, spend $80 and $20 on alterations.
You’ll be so happy you did. It really makes a difference when I do this with many of my trousers.
Because you’ve had your alterations made specifically for your body shape, everything just seems like it was made for you when the waistline fits and you have space on the hips.
Yes, it does cause a minor annoyance. Yes, it can increase costs a little bit. However, I believe the benefits of the alterations are well worth the effort.
Elastic Trick
The essential item you’ll need for this project is a one-inch non-roll elastic, which will ensure that your waist fits perfectly.
Take the elastic and measure it around your waist to determine how much you will need to wrap it completely around your waist. After you have determined this amount, deduct a couple of inches from the measurement you obtained.
That’s where you’ll want to snip it. The amount of stuff we will require is roughly that, more or less.
Following this step, you will need to make some cuts in the waistband of the jeans. We just need two holes on the inside, so be careful to only cut the inner part and not the outside.
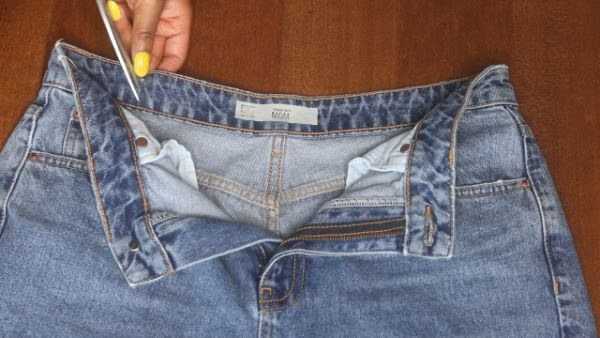
You just made a little pocket and your finger can go through the hole. Make sure to do that on both sides.
Take your elastic, and what you’re going to do is pretty much just feed it through the loop that’s been made. This is going to end up looking a lot like kid’s jeans.
Attach a safety pin to the end of elastic. It makes it much easier for us to feed the elastic through.
This part will most likely cause a cramp in your hand. The best tactic here is to scrunch it up over the safety pin and then just pool it. It just doesn’t slide super easily.
It will undoubtedly take some time, but keep going until you reach the end. You’ll eventually make it to the other end and have the elastic all the way through.
You may simply clip off any extra elastic once you’ve completed the full circle. You don’t need too much to be coming out from any sides.
This is where you can pick between two options.
The first one is quite simple. It’s a little risky. Simply use safety pins to fasten each end. I’ve done this several times, and it just stays through washing. Just pull the elastic as tight as you need it to fit your waist nicely.
You’re all set to go now. Your waist will look fantastic.
The next method is to attach a button. You will need a needle and thread for this. Once the button is fastened, cut a small hole in your elastic so that it may go around the button. It’s gonna be secured that way.
You can add additional snips to your elastic so you can adjust it to fit your body’s shape and appearance on any given day.
So those are the best advice I have for fixing gaping jeans.