
Are you tired of the same old hairstyles and looking for a chic yet effortless look for your next formal event? Look no further!
Here we’re diving into the art of creating a stunning textured chignon bun, as demonstrated by the talented hairstylist featured in this video tutorial.
With a focus on achieving that coveted low messy bun style, this tutorial offers invaluable tips and techniques for mastering the art of textured updos.
From curling techniques to product recommendations and bun formation, get ready to elevate your hairstyling game with expert guidance.
Whether you’re attending a wedding, prom, or simply want to add a touch of sophistication to your everyday look, this step-by-step guide will have you turning heads with confidence.
Let’s delve into the details and learn how to recreate this elegant yet relaxed hairstyle effortlessly.
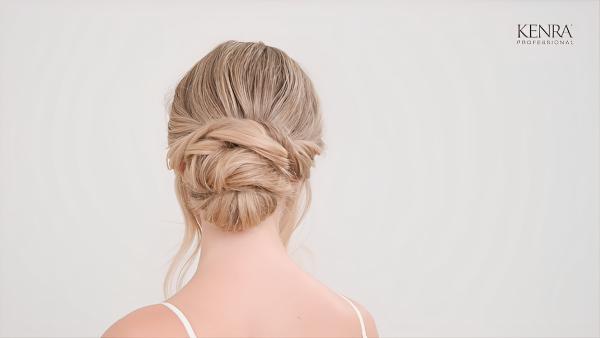
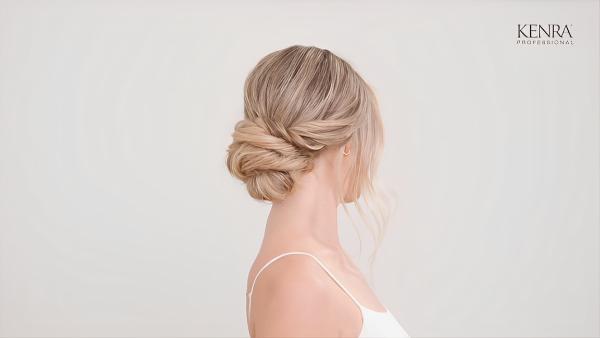
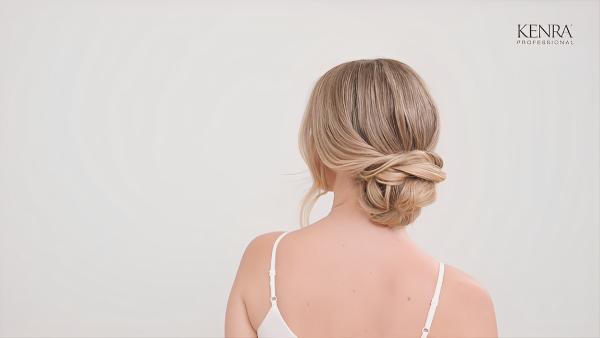
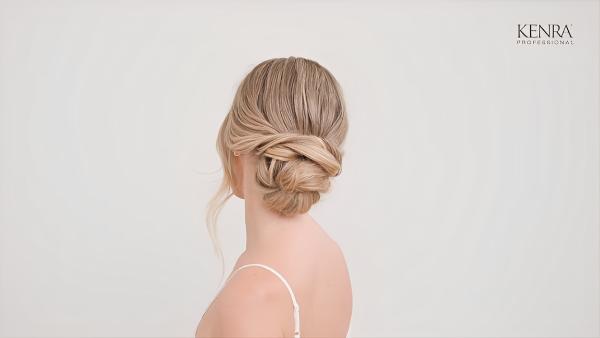
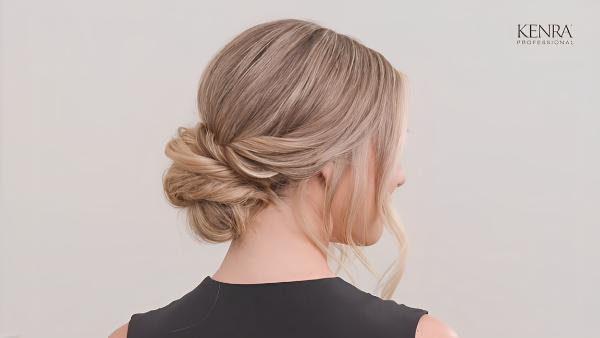
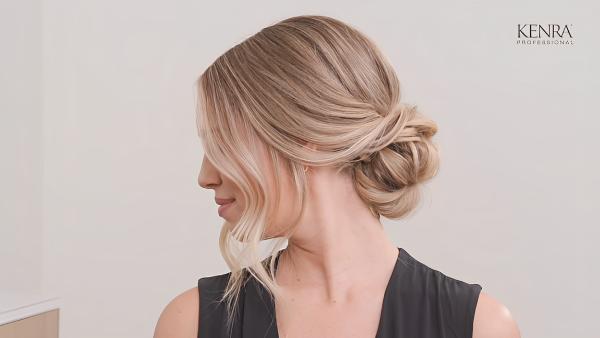
Stephanie Brinkerhoff, a professional hairstylist begins by introducing the tutorial topic – creating a textured low messy bun. She mentions the style’s popularity and her intention to provide helpful tips for viewers to recreate it.
Curling Technique: Stephanie explains her approach to curling the hair using a 1 1/4 inch curling iron. She emphasizes curling away from the face on both sides and leaving the ends slightly straight to achieve the desired textured look.
Product Application for Texture: Throughout the process, Stephanie utilizes specific hair products to enhance texture and hold. She starts with Kenra Hot Spray 20 to protect the hair from heat damage and provide longevity to the curls. Additionally, she applies Kenra Perfect Medium Spray 13 and Kenra Spray Clay 15 to add volume, bulk, and texture to the hair, making it easier to work with.
Bun Formation and Styling: After curling and adding texture, Stephanie gathers the hair into a loose ponytail at the center back of the head. She ensures the top section of the hair remains disheveled to maintain texture. While wrapping the hair into a bun, she emphasizes not pulling too tightly to preserve the textured appearance.
Finishing Touches and Personalization: Stephanie completes the bun by securing it and adjusting the amount of hair left out to achieve the desired level of messiness or neatness. She twists and pins strands around the bun for added detail and finishes with Kenra Volume Spray 25 to tame flyaways and provide extra security.
Overall, the tutorial provides detailed instructions and insights into creating a textured chignon bun for formal occasions.