Nail polish is a fantastic way to express your style and personality. With a myriad of colors and finishes available in the market, choosing the perfect nail polish color can be both exciting and overwhelming.
Whether you’re a nail art enthusiast or someone who prefers classic shades, this guide will help you navigate the vast array of options and find the ideal nail polish color that complements your style and enhances your overall look.
Understanding Your Skin Tone
One of the fundamental aspects of choosing the right nail polish color is understanding your skin tone. Skin tones generally fall into three categories: warm, cool, and neutral.
- Warm Skin Tones: If you have warm undertones, which often have hints of yellow, peach, or gold, earthy tones and warm shades like coral, orange, and warm reds complement your complexion beautifully.
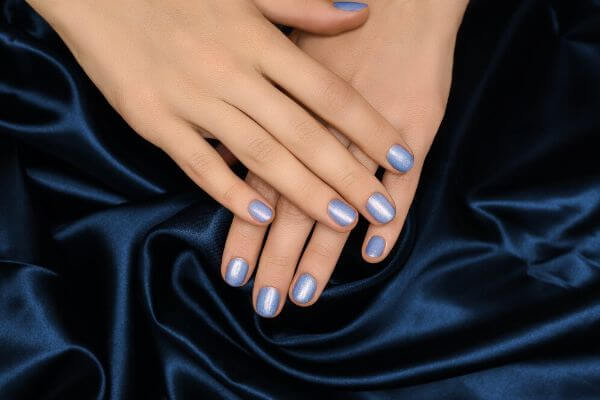
- Cool Skin Tones: Cool undertones, characterized by shades of pink, blue, or purple, pair well with cool colors such as icy blues, lavender, and cool-toned pinks. Shades like deep burgundy and emerald green also work wonders for cool-toned individuals.
- Neutral Skin Tones: Individuals with neutral skin tones have a mix of warm and cool undertones. Luckily, they have the flexibility to experiment with a wide range of colors, from muted neutrals to vibrant hues.
Consider the Occasion
The occasion plays a significant role in determining the appropriate nail polish color. Here are some suggestions based on different occasions:
- Formal Events: For formal events like weddings, corporate meetings, or black-tie parties, it’s best to opt for classic, understated shades. Nude, pale pinks, soft greys, or sheer beige are elegant choices that exude sophistication.
- Casual Outings: For casual outings or everyday wear, you can get more creative with your nail color choices. Pastels, bright neons, and playful patterns can add a pop of color to your look and showcase your fun-loving personality.
- Special Occasions: Special occasions like birthdays or holidays give you the freedom to experiment with bold and festive colors. Think glittery gold, sparkling silver, or deep jewel tones like sapphire and amethyst for a glamorous touch.
Consider the Season
Seasonal changes can also influence your nail polish color choices. Here’s a breakdown of suitable colors for different seasons:
- Spring: Spring is associated with blooming flowers and pastel hues. Soft shades of pink, mint green, lavender, and sky blue are perfect for capturing the essence of this season.
- Summer: Summer calls for vibrant and lively colors that reflect the energy of the sun. Opt for bright oranges, hot pinks, turquoise, and sunny yellows to complement the cheerful atmosphere.
- Autumn: Fall is all about warm, earthy tones inspired by the changing leaves. Deep reds, burnt oranges, olive greens, and rich browns are excellent choices for capturing the cozy feel of autumn.
- Winter: Winter brings a sense of sophistication and elegance. Deep blues, dark purples, emerald greens, and metallic shades like silver and gold are ideal for creating a chic winter look.
Experiment with Finishes
Nail polish comes in various finishes, each offering a unique look and texture. Some popular finishes include:
- Cream: Cream finishes are smooth, glossy, and offer a solid color without shimmer or glitter. They are versatile and suitable for both formal and casual occasions.
- Matte: Matte finishes lack shine and offer a velvety, flat appearance. They are chic and sophisticated, making them ideal for formal events and winter seasons.
- Metallic: Metallic nail polishes have a shiny, reflective surface that gives a polished and glamorous look. They are perfect for special occasions and parties, adding a touch of extravagance to your nails.
- Glitter: Glitter nail polishes contain small particles of glitter that add sparkle and dimension to your nails. They are excellent for adding a festive touch to your nails and are often chosen for celebratory events.
Conclusion
Choosing the perfect nail polish color involves considering your skin tone, the occasion, the season, and experimenting with different finishes.
By understanding these factors and exploring the vast array of nail polish options available, you can confidently select colors that enhance your style, express your personality, and make a statement wherever you go. Remember, nail polish is a form of self-expression, so don’t be afraid to get creative and have fun with your choices!

How to Mix Nail Polish Colors
Mixing nail polish colors can be a fun and creative way to customize your nail color and create unique shades that match your preferences or the latest trends. Here’s a step-by-step guide on how to mix nail polish colors effectively:
Gather Your Supplies
- Nail Polish Bottles: Empty nail polish bottles or small glass containers to mix and store your custom nail polish.
- Nail Polish Colors: Choose the nail polish colors you want to mix. Ensure they are of the same formulation (e.g., both are regular nail polishes or both are gel polishes) for a consistent texture.
- Mixing Tools: Toothpicks, small plastic spoons, or mixing balls to blend the colors thoroughly.
- Clear Nail Polish: Clear nail polish acts as a base and helps dilute the colors, making them easier to mix.
- Nail Polish Thinner: Nail polish thinner can be added if your mixture becomes too thick. It helps in restoring the original consistency.
- Paper Towels or Tissues: To clean your mixing tools and wipe off excess polish.
Steps to Mix Nail Polish Colors
- Prepare Your Workspace: Lay down some paper towels or tissues to catch any spills and keep your work area clean.
- Choose Colors: Select the colors you want to mix. Start with a small amount of each color to experiment before making a larger batch.
- Mixing the Colors:
- Use a toothpick, small plastic spoon, or mixing ball to scoop a small amount of the first color into an empty nail polish bottle or glass container.
- Add an equal or desired amount of the second color to the container.
- Use the toothpick or mixing tool to blend the colors thoroughly. Stir gently and consistently until you achieve the desired color. If the mixture is too thick, you can add a few drops of clear nail polish or nail polish thinner and mix again.
- Keep experimenting with the ratios until you achieve the color you desire. Remember that the colors might appear different when dry, so you can apply a small amount on a nail to test the shade.
- Test Your Mixture: Apply a thin coat of the custom nail polish on a nail or a nail wheel to see how the color looks on your nails. Allow it to dry completely to observe the final shade and finish.
- Adjust and Refine: If the color is not exactly what you want, you can continue to adjust the mixture by adding more of one color or experimenting with other shades until you achieve your desired result.
- Seal the Bottle: Once you are satisfied with the custom nail polish color, seal the nail polish bottle tightly to prevent it from drying out. You can use a funnel to transfer the polish back into its original bottle for easier application.
Remember that mixing nail polish colors is a creative process, so don’t be afraid to experiment and have fun. With practice, you can create a wide range of unique and personalized nail polish shades to match any occasion or mood.


